I have put a lot of thought into how I would teach my children about what happened on this day 12 years ago. Most of them weren't even born. The others were too little to remember. I have talked with my children, many times, about our country's history and that includes the events that took place on September 11, 2001. I remember exactly where I was, what I was doing and even what I was wearing. I want my children to gain something from what happened. This year I have decided to do a few things to help them understand what happened and to help them keep the families and victims in their minds, hearts and prayers.
For my older children, I printed off some notebooking pages. We are using one dedicated to the heroes (write about why they are heroes and why we are thankful for them), one with the NY skyline (write a summary about what happened, how they can help their country become stronger and what they have learned from the actions of others on that day), and one with our national anthem (write about the freedoms they are thankful for).
We are going to be watching this video from BrainPop. It explains what happens without being too scary or graphic. I would watch it first to be sure it's right for your family. After watching the video, we will do some of the activities that can be found at the end of the video. I am also going to be pointing out how much people helped and loved each other even though they were strangers and how our country turned to God for comfort and help. I will be focusing on how we can rise from our trials and from the evil of the world and find strength in doing what is right and serving others.
For my younger children, I will be explaining what happened in a very child friendly way. I want them to know the basics of what happened and about the heroes of that day and the months that followed. I will be giving them this coloring page and talking about the heroes in our lives and how they make us feel. I want my little ones to feel safe so I will only be going over the events lightly. I want them to focus on the heroes that came out of that terrible day.
We started our day with a little devotional. We watched this video and this video put our flag out and said the pledge and a prayer.
I have also challenged every member of my family to do an act of service for someone every day and report on it at dinner. I want them to know that they can change the world with their actions of love. What a better day to start this tradition than this one. I hope you can find a way to share your feelings about this day with your children. Don't ever forget what happened. Let's teach our kids to be amazing citizens of this great country and that we can rise from tragedies and trials stronger, more faithful and with a great determination to be more like Christ.
Wednesday, September 11, 2013
Tuesday, September 3, 2013
Artsy Fartsy
All of my children enjoy art. We like to use art, in some form, in every subject. Peaches, Blue and Pinky like to draw, paint and color daily. Pinky is having a lot of fun with graph paper art. There are even patterns that can be found online. Pinky likes to use patterns and create her own. Here is some of her recent work.


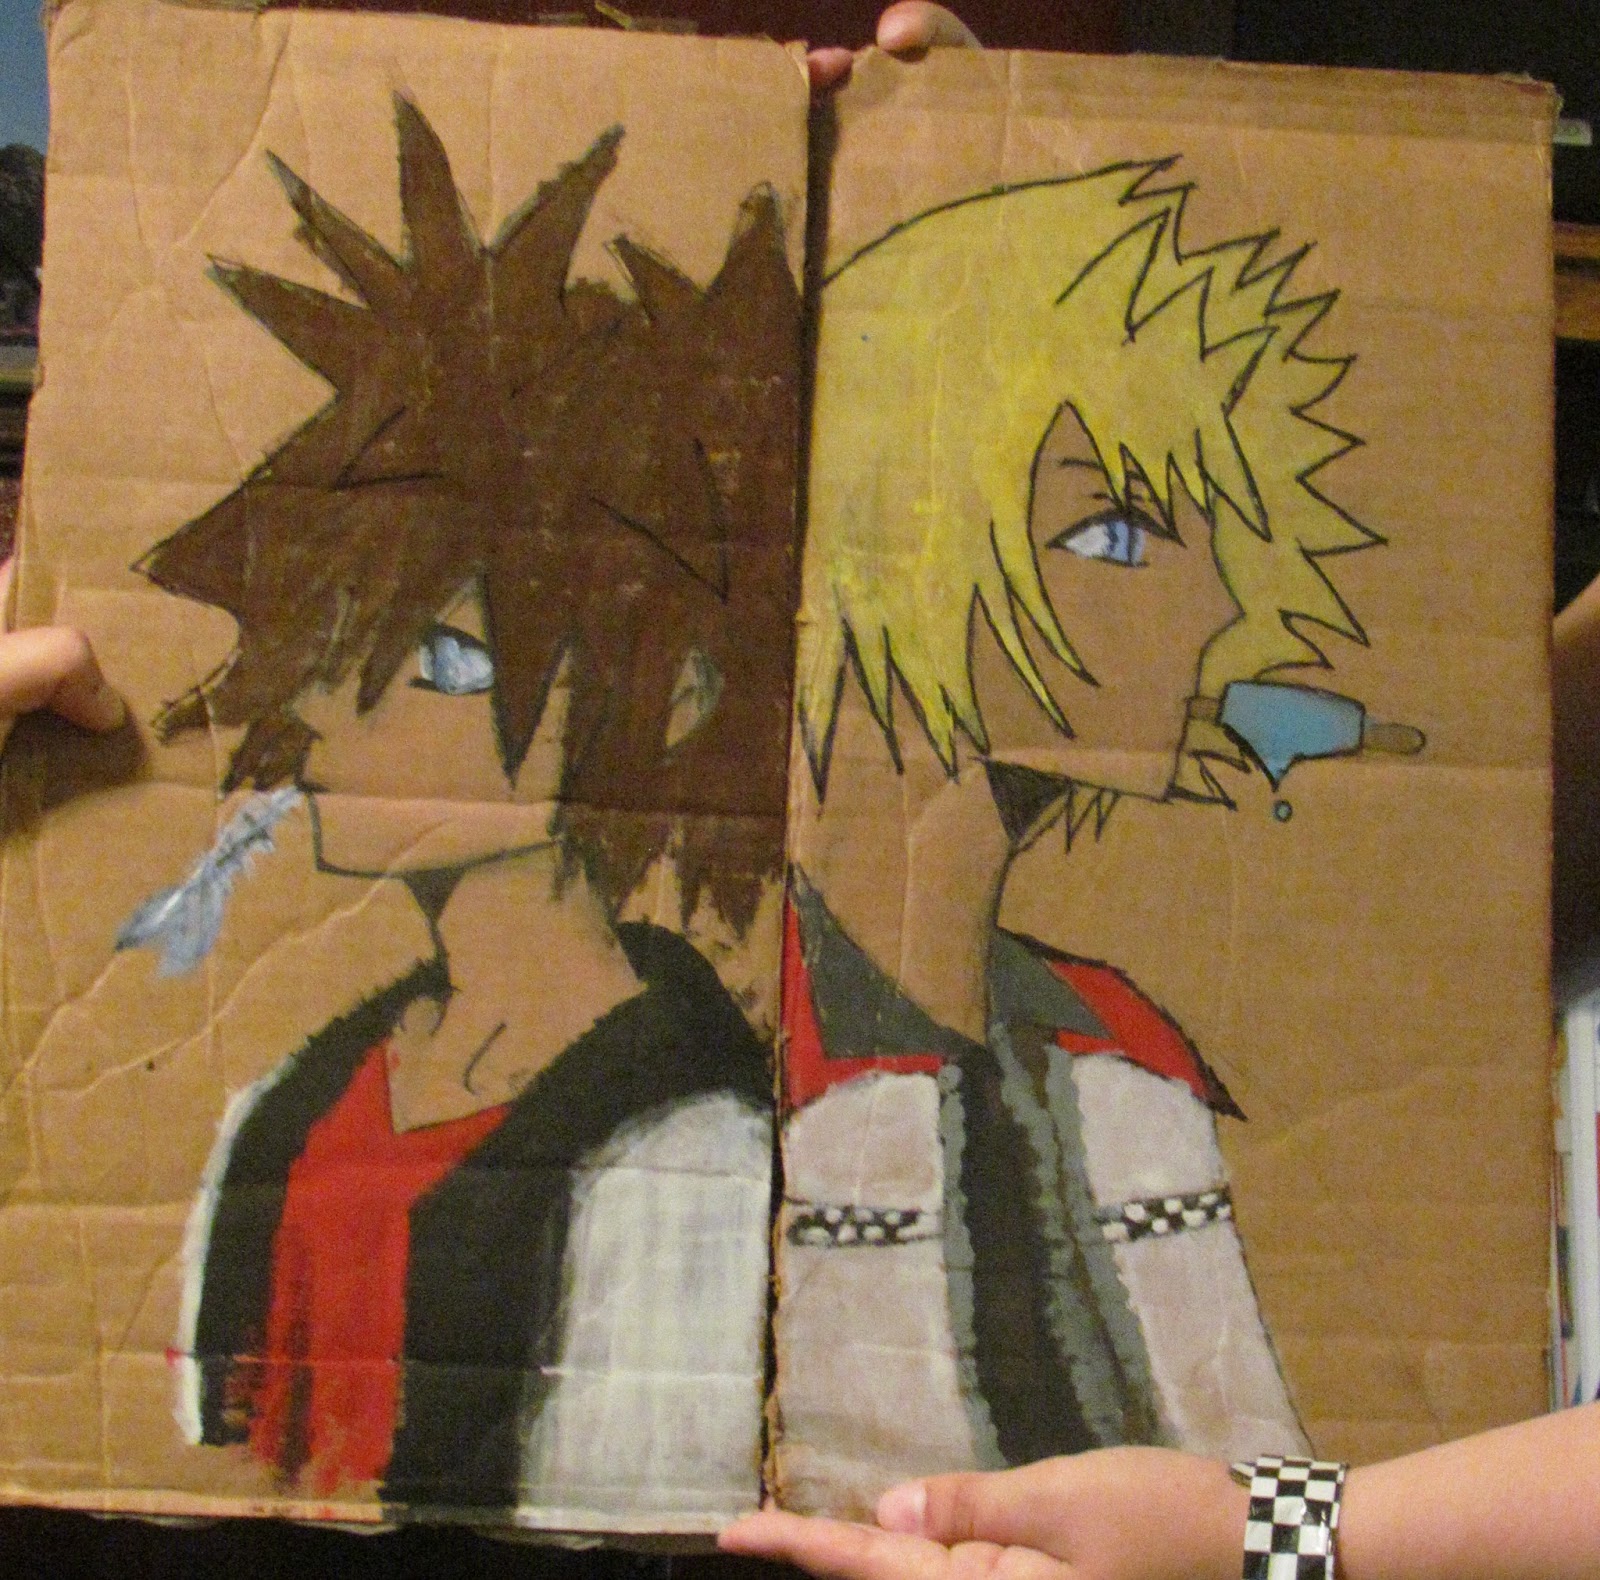
 Trying to keep several children supplied with canvas, for painting and art projects, can be expensive and difficult if you are on a tight budget. Peaches and Blue decided canvas was overrated and used pieces of cardboard to draw and paint pictures of some of their favorite video game characters from Kingdom Hearts. I think they turned out great!


 We will be creating an "Art Hall" or a place to display their artwork. When we get it completed I will post pictures.


From what I have been told, the two characters below share the same heart. Sounds pretty strange to me. :-/ Peaches and Blue informed me that the picture below shows how the two characters will be displayed. They are still trying to come up with a way to frame them.
Monday, September 2, 2013
Preschool Mania
I know I am not the only one who has more than one child in the preschool age group. This can be a blessing but also a challenge. I have 4 year old twins and a 19 mos old, all of which want to be doing the same things as their siblings but also have very different learning styles. It doesn't help that the 19 mos old tries to eat everything, including her older siblings art projects.
We have had to think outside of the box to include all of their learning styles while giving them the same activities. Here are some of the activities we have come up with to keep their interest.


First, we use a lot of material from our favorite homeschooling website found here. We use the "Getting Ready 1" program and supplement with materials we have on hand. I like the use of music, stories and crafts included in the program. I have a child who is very hands on and loves music. He doesn't like anything that is going to take a long time to complete. His twin does like music but really enjoys stories and art and takes her time on everything. Gremlin just likes to be in the middle of it all and wants to be sure not to miss out on anything.
These are some of the crafts found in the "Getting Ready 1" program for the letter B.


I enjoy the Montessori way of teaching and in following that philosophy, sand writing or drawing is a great activity for children to grasp the way letters and numbers are written and shapes are drawn. We use letter cards, both upper case and lower case, face down on the table. Each child takes a turn drawing a card. The letter on the card is the letter they draw in the sand. I found finger painting trays and sand at Michael's. This activity is great for my hands on and artistic learners. Sometimes we also play ABC music quietly in the background. Luke spends a little more time on each activity when the music is included. Peaches really liked helping Luke and Leia.


We have tried sand with Gremlin but she is still young enough to want to eat the sand. The packaging says not to ingest so we have to keep her busy with something else.
Gremlin really enjoys sorting even if she doesn't really grasp the concept of categories. She just loves moving objects from one place to another. I use just about anything for this activity. We use small eraser shapes, buttons, glassy stones found in fish tanks, beads and sometimes crackers and grapes. She does need to be supervised so that she doesn't choke on the manipulatives...hence the use of food when supervision is minimal. We use small cups, bowls and ice cube trays for sorting containers.
Here she is using the glassy stones and ice cube trays. She likes to have two different ice cube trays.

I love bulletin boards. However, I do not have the wall space for them. I have already put up a calendar/weather center and an alphabet train. I feel like there is a need for numbers, shapes and colors as well. My solution is a mini cubical or learning station. I used laminated flashcards attached to a display board with poster tack. I used the poster tack so that I can change the bulletins with each child's needs without having to buy another display board. I put two clothes pins in the center attached with self adhesive magnets so that each child can display artwork, worksheets or pictures. It can also be used for holding daily assignments. I believe I found all of the flashcards on this website. You just have to join and search for what you need. It's an amazing website with tons of resources for every age group.


My twins love having a "private office" to work in. :) These learning stations have helped my visual learners as well as my artistic learners. My older children personalized their own and even put their names on them.
A favorite activity is paint dots. These can be used for so many different activities. I purchased my paint dots at Walmart during their school supply sale.

My children really enjoy the Do-a-Dot worksheet found here. Even Gremlin could participate. Can you guess which ones she did? ;)

It is always fun to find new ways of teaching our children. I hope some thing here helps spark some ideas for you and your family.
Book Report Star.
My children write a lot during the day. They write in language arts and English. They also write reports in social studies and science. With all this writing, I feel like they should have the opportunity to get creative with some of their reports. Pinky had to do a book report and didn't want to write a traditional one. She decided to make a book report star. Because I don't know how to make the star, she made a photo tutorial on how it's done.
First you need 6 sheets of paper. Pinky used construction paper. If you want a multicolored star, you will need different colors. Pinky likes two colors so she used three sheets of each color.


Take one sheet of paper at a time and follow these next steps with each one.


Fold one of the top corners down until it makes a triangle like the picture below.

Cut off the end of the paper so that you have just the triangle portion.


Starting from one of the folded corners, cut a one inch strip leaving it connected at the top. Then do the same with the opposite corner. Be sure to leave enough space at the top so that the strips don't tear off while you are putting the star together.

Move towards the center of the fold by approximately one inch and cut strips the same way you did with the first two, leaving them connected at the top.

Move towards the center of the fold another inch and cut two more strips leaving them connected at the top. After cutting the three pairs of strips, unfold your paper. It should look something like the photo below.

This would be a good time write on the strips. Pinky used 4 sheets of paper for the main characters in her book. She wrote on the strips on both sides. She included character descriptions, strengths, weaknesses and main events they were apart of in the book. She used the other two sheets for plot, moral of the story, climax, conflict and solution..ect. When you are finished writing on the strips, take the corners of the center and staple them together in the middle.

Flip the paper over and do the same thing to the next set of strips.

Turn the paper over again and do the same thing to the next set of strips.

Turn the paper over one more time and do the same thing to the last set of strips.

After you have completed all of the sections of the star. Pick two sections that you want to be next to each other and staple them together, side by side. It works better if you staple a small side to a big side.

Staple another one to one of the sections making a cluster of three sections side by side.

Staple the ends of all three sections together.

After creating another cluster of three, staple the the ends of both clusters together.

Staple the sides together so that the two clusters are completely connected.

When you are finished connecting the sides, your star should look like this.

We like to hang ours from the ceiling in our school area. Pinky organized her star so that the characters were together on the bottom and the parts of the story were on the top. You can organize yours however you would like. It's a fun and quick way to display everything your child has learned from their book or lesson.
This is the one Pinky made. She forgot to write on the strips before making the star so her handwriting isn't the best. But, I can still read it. I think she gets an A for creativity and organization.

I love creative reports. I will be sharing more with you as we go through the year. Have fun with reports and writing. Kids will be more open to reading, writing and learning if they know there is a fun activity at the end of all of their hard work. It is also rewarding to display something they have created. All of my children enjoy doing creative reports.
Saturday, August 17, 2013
Getting Ready!
I do have to apologize for taking so long to post something. I have been very busy with family and getting ready for a new year of school. I have found so many great deals. I have also been doing a lot of organizing. While getting things ready, I thought about how all of you might utilize the space you have in your home.


I don't have a lot of space to work with so I have to get a little creative and try to keep things as organized as possible. I have a deep closet that I had been using as an extra pantry for food storage and bulk foods. I decided to clean it out and use it as a school closet. We have been able to fit a lot of supplies and fun activities in there. Anything and everything my kids would need to supplement their education and allow them to use their creativity is stored in the closet.

I was pleasantly surprised to find that we still have room to add to our collection if needed. This is the top half of the school closet.

I used several different storage ideas. I used plastic pencil boxes for things like erasers, colored pencils, flashcards and several manipulatives and activities. Here are a couple of the activities stored this way.

We use pencil pouches to store other fun activities and manipulatives.

I used magazine holders to store file folder games, mini offices, coloring and activity books and activity mats. I also used jars and small bowls with lids, to hold things like buttons, craft sticks, tacks, and other manipulatives. Extra notebooks, folders and paper fit nicely behind the items that we use frequently.
This is the bottom half of the closet. I used shoe box sized totes to store things like glue, pom-poms, paints, play dough, math manipulatives, markers, crayons, pencils and pens and colored sand. I used larger totes for pipe cleaners. Each child also has a larger tote for their notebooks, white board and assignments.

This is our school hutch. It stores our textbooks, printer paper, card stock, laminate, educational magazines, music, and some of our reading books. The rest of our books are upstairs on books shelves.

This is our weather center and calendar for the our younger children. We had to put it up in our living room since we school in our dining area and living room. We don't have much wall space so our home is not, what I would call, beautifully decorated. But I don't mind. I love the evidence of children living and learning in my home. There is something about it that makes my heart happy. (CHEESY! Also true). Please excuse the glare in the picture. I only pretend to know how to take pictures.

This is our bulletin board. We use it to display the work of our children. The younger kids use it all the time. The older kids only use it when they feel like they need to show off. ;) The red thing hanging next to the bulletin board is what holds my extra calendar labels. They fit nicely and and don't get bent. I found it at Target in their dollar section.

This our alphabet train for the younger children. I put it up over their table so that they can see it whenever they work. I found it at Michael's and only paid a little over $6.00 because it was on sale for 50% off and I had a 10% off total purchase coupon.

There is nothing like getting a good deal on items that you need. I found these workbooks at Target for $1.00 in their dollar section. There is a book for just about everything from learning the alphabet, shapes and colors to multiplication and division and everything in between.

This is the inside of some of the workbooks. They have colorful pages and great activities to supplement any curriculum.

This is a preschool book I found for $3.00 at Target in their dollar section. It is full of everything a preschooler needs to know before kindergarten and then some. I thought it was well worth the money spent. It has already proven to be a great supplement to our preschool/kindergarten curriculum.

These colorful puzzles and sturdy dry erase boards were also found in the dollar section at Target. However, I can't remember the price. I think I was a little too excited to find so much for so little.


This is the other side of the map dry erase board.

I hope you all are excited about starting a new year of homeschooling and that you are finding all of the great deals you need. This is a great time of year to stock up on everything you need for the entire year. If you have any great storage and organization ideas, please feel free to share them with me. I hope this school year gets off to a good start for everyone.
Subscribe to:
Comments (Atom)